In just under two weeks I’ll have to present how to use OAuth 2.0 authentication to call REST APIs of Dynamics 365 Business Central. Should be easy. Not only I have already done
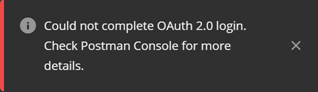
OAuth integrations, but there is also a nice step-by-step tutorial by Microsoft specifically done for Business Central. So, I followed the steps to the letter (as much as that was possible), and after all was done, I tried to use Postman to get myself an OAuth 2.0 token for invoking Business Central REST APIs, but it didn’t work. No matter what I did, Postman kept returning this:

(Could not complete OAuth 2.0 login. Check Postman Console for more details.)
So I checked the Postman Console for more details.

(access_denied; Error)
Quite some detail.
After a ridiculous amount of time troubleshooting this, I figured it out. Depending on how your Business Central trial account was configured you may encounter this problem. On top of it add the fact that the documentation isn’t exactly straightforward and at couple of places leaves you (educated-)guessing. So I decided to write this blog in case you (or myself at some future point after I will have forgotten I’ve been in this mess) ever need it.
For the sake of simplicity, I’ll just assume that you have a Business Central account, trial or otherwise.
Let’s start first with how to really set it OAuth 2.0 authentication without any need for guesswork.
1. Sign in to Azure Portal with the account you use to sign in to Business Central.
2. Create an Azure Active Directory Web app / API registration
With OAuth 2.0 authentication things are not simple, for a reason. You have a back-end AAD-managed resource you want to access (such as Business Central) and a third-party app that wants to access it (whatever integration you are developing). There should be a contract between the two, that applies only to those two parties, that controls whether an app can access your AAD-managed resource. That’s why you need to create an app registration record in your Azure Active Directory to control access the integration you are developing has to Business Central.
This is what you are configuring in this stage.
In the navigation pane, click on Azure Active Directory

If, by any chance, you don’t see this there, then click on All Services:

Then in the All Services search box, enter “Directory”:

And then in the list of found entries click Azure Active Directory.
Follow these steps to create an app registration:
- In the list of the Azure Active Directory resources, click App registrations.

- Click New application registration:

- Populate the Create blade with your app information:
Name should be unique for your Active Directory.
Application type must be Web app / API.
Sign-on URL must be https://businesscentral.dynamics.com/
Here’s an example:
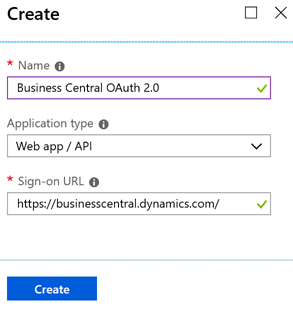
- Click Create. After a few seconds the Registered app blade will show up automatically and display the information about your freshly created app registration.
- In the Registered app blade, select and copy the value under Application ID, or alternatively hover your mouse over it and click the copy button that appears:
 . Store this value somewhere; you will use it as the Client ID during OAuth 2.0 authentication protocol.
Microsoft’s Getting Started article fails here. First, it directs you to a generic Azure how-to document which explains how to create any application registration type, including native (which you must not choose for Business Central OAuth 2.0 authentication). Second, it never tells you which Sign-on URL to use. It should be obvious, but you might get creative with known URLs like https://login.microsoftonline.com/ or whatever else.
Now that you created your app registration, you must configure it.
- In your Registered app blade, click Settings:

- In the Settings blade, under API Access section, click Required permissions:

- In the Required permissions blade, click Add:

- In the Add API access blade, click 1 Select an API:

- In the Select an API blade, you need to select Dynamics 365 Business Central, but most likely it is not listed. Don’t worry, you can still search for it. In the search box, enter “Dynamics”, and then click Dynamics 365 Business Central:

- Click Select.

- In the Enable access blade, click the Delegated permissions checkbox.

- Click Select.

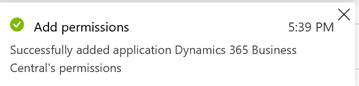
- In the Add API access blade, click Done.

In a few seconds, a notification message will confirm successful configuration of permissions:
- Back in the Settings blade (should be still visible), still under API Access section, click Keys:

- In the Keys blade, under Passwords section, populate the first empty row by entering a unique value into the Key description text box, and selecting one of the available durations from the Duration combo box:

Your key description should be descriptive enough to indicate which app (or integration) it is being used for. Don’t use generic names as I did here if you are developing a lot of different integrations. - Click Save:

This generates your access key:

A warning message on top tells you to copy the key value. It will only be visible once, and once you navigate away from the Keys blade, you won’t be able to retrieve the key, and you would have to create a new one.

Copying this key is important. Copy it and store it somewhere. Don’t lose it. This key will be used as your client secret when authenticating using OAuth 2.0, and you should only ever use one key for one integration (one application) that communicates with the back end. You can easily revoke the keys or create as many keys as you need for other integrations (applications) you will develop.
In case you prefer it this way, here’s a short gif video that shows all of these steps in one go:
Before you can try out your OAuth 2.0 authentication, you need to copy your directory ID. It will be used during the authentication protocol, and Azure will use it to know which specific Azure Active Directory to look into.
- Close all the open blades, or simply click Azure Active Directory to return back to the overview of your active directory.
- In the list of resources, click Properties:

- In the list of properties, locate the Directory ID property, and select and copy its value. Alternatively, click the copy button
 .
.
3. Test your OAuth 2.0 with Postman
I am using Postman for two reasons. First, apparently it’s the new black and these days everyone and his sister is using it to try out REST APIs. The second reason is that it already comes bundled with full support for OAuth 2.0 authentication and I don’t need to develop my own client.
Follow these steps:
- Start Postman. If you didn’t do it already, then download and install Postman from https://www.getpostman.com/, and then start it.
- Close the Create New dialog. You don’t have to, here you really can do nearly any of the offered options, but since I want to show only how to get the OAuth 2.0 authentication token, this is the simplest options.
- In the Untitled Request tab, click Authorization.
- From the Type combo box, select OAuth 2.0:
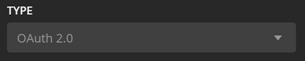
- Click Get New Access Token:

This will show the Get New Access Token dialog. - Enter any descriptive name in the Token Name field. This is completely irrelevant.
- Leave Grant Type at Authorization Code default value.
- In the Callback URL field, enter https://businesscentral.dynamics.com/
- In the Auth URL field, enter the specific authorization URL for your Azure Active Directory. If you don’t have it, it’s this:
https://login.windows.net/<your_directory_ID_here>/oauth2/authorize?resource=https://api.businesscentral.dynamics.comIf your Directory ID (you copied it in the previous step, remember?) is eec4d82e-660b-4afa-b4c8-c8b60d5fee4c, your Auth URL will look like this:
https://login.windows.net/eec4d82e-660b-4afa-b4c8-c8b60d5fee4c/oauth2/authorize?resource=https://api.businesscentral.dynamics.com - In the Access Token URL field, enter the token URL for your AAD. It’s similar to the one above, only instead of the “authorize” part, it has “token”. Something like this:
https://login.windows.net/eec4d82e-660b-4afa-b4c8-c8b60d5fee4c/oauth2/token?resource=https://api.businesscentral.dynamics.comImportant: For these two endpoints you must use the ones as explained in this and the previous step. Do not use the endpoints listed under the Endpoints section of your Azure Active Directory App registrations blade, that you may be familiar with from earlier. Those endpoints only accept POST requests, and Postman makes GET requests during OAuth 2.0 authorization process. - In the Client ID field, enter your app registration ID (you copied it earlier, right after creating it).
- In the Client Secret field, enter the key value from your API Access Keys configuration of your app (you also copied it earlier). This is what your fully configured Get New Access Token dialog may look like at this point:

- Click Request Token.
This is where OAuth 2.0 protocol kicks in. Postman will open a dialog containing an embedded browser and send a HTTP GET request to your authentication URL and pass the necessary parameters (Client ID is the most important at this stage). -
Enter your credentials. Don’t worry, Postman will not see them. At this point, even if you entered correct credentials, there are several possible outcomes:
- If you provided wrong Client ID or Callback URL different than the one specified during the App registration creation process:
This is easy, simply check all the details of the error message (always provided!), they will tell you exactly what’s wrong, and it should be easy to fix. - If you provided an incorrect client secret, you will get this:

If the incorrect client secret is the reason why you see this message, it’s also easy. Go back, provide the correct client secret, and retry. If you got the client secret correctly, option d) will apply to you. However, there may be that the option c) applies to you. - If your Azure Active Directory is not a managed AAD and doesn’t have an administrator, then you will also see this:

You, lucky you, you! You are really lucky to have me, because you don’t have to go through the troubles I went through, that made me spend two hours writing this post for you. There is more info for you a little further down. - If you entered all OAuth 2.0 details correctly and your AAD is managed, then you get this:
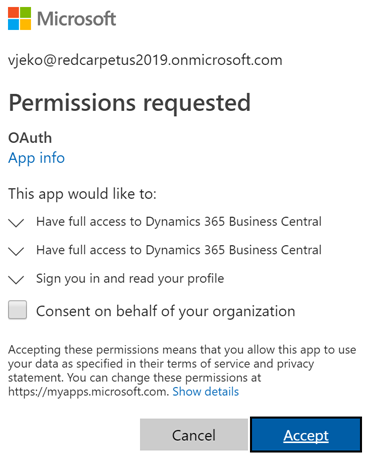
- If you provided wrong Client ID or Callback URL different than the one specified during the App registration creation process:
Now, if you got this last one, under d), check the Consent on behalf of your organization, then click Accept, back in Postman in the Manage Access Tokens dialog scroll down, then click Use Token, and see you next time, we are done here, really – you just got your OAuth 2.0 token and can play around your Business Central APIs using production-grade security.
However, however… if you were as unlucky as I was the first time, you got this guy:
It took me ridiculous amounts of time to troubleshoot this one. No piece of documentation, no errors to hang on and google a stackoverflow solution, no absolutely nothing. Total darkness. It actually took me two additional Business Central trial tenants before I got one working. I got surprised when it finally worked, and then I figured out what is the problem: apparently you cannot use OAuth with an unmanaged Azure Active Directory.
To check if your AAD is managed, click All Services, then search for “Subscriptions” and then you see no subscriptions listed, like this:
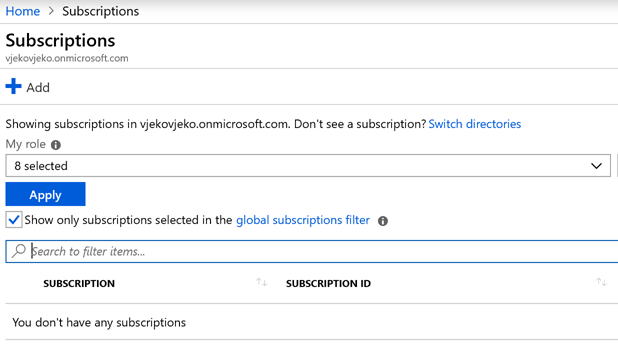
Click Add and then attempt to add a subscription. If your AAD is unmanaged, you won’t be able to do this.
But how did I get into this mess in the first place? I must have done something wrong! Er, no. What I did is that I simply subscribed for Business Central trial with my e-mail address with an account that didn’t have AAD tied to it already. And this will happen to you too, if you do the same. I verified this by getting myself two extra domains (cost me $3.34 at NameCheap.com) that I didn’t first sign up for Azure, and then successfully signed up for Business Central trial only to get stuck at the OAuth 2.0 wall.
What happens when you sign up for Business Central trial? One of the following may happen:
- If you use an e-mail with a domain that already has a production Business Central tenant, you will not be able to sign up for a new trial.
- If you use an e-mail with a domain that already has a trial Business Central tenant, you will be joined into that trial organization (after successful verification that you own that e-mail)
- If you use an e-mail with a domain that already has a managed Azure AAD (for example, from Office 365) but no Business Central trial tenant, your new Business Central tenant will be provisioned, and you’ll be able to use OAuth 2.0 using the steps I described in this blog.
- If you use an e-mail with a domain not associated to an active Azure AAD, a new shadow Azure Active Directory (unmanaged AAD) will be created for you first, and then a new Business Central tenant will be provisioned. You won’t be able to use OAuth 2.0 until you perform the administrative takeover.
Luckily, Azure provides a guide how to perform the administrative takeover:
https://docs.microsoft.com/en-us/azure/active-directory/users-groups-roles/domains-admin-takeover
The kind of takeover you want to perform is the internal takeover, and the steps are explained here:
Simply follow these steps, and your AAD becomes a managed one, and you are now able to authenticate with OAuth 2.0.
Now, I don’t know (but I do intend to find out!) whether this is something by design, or simply a bug somewhere in either the sign-up process or OAuth 2.0 process. I have strong reasons to suspect that it’s actually a bug. It can be 100% repeated if you try creating your new Business Central trial from an e-mail that has no prior knowledge or ties to any AAD domain. If you sign up using such an e-mail, even though Business Central wires up your fresh new AAD, it doesn’t allow you to use OAuth. However, if you have AAD already, and then sign up for Business Central, it seems to work. To me, this sounds like a bug, especially because setting up AAD is an infrastructure task, and signing up for Business Central trial is intended to be performed by people without any knowledge of AAD or infrastructure or anything.
In the course of finding out what exactly is causing OAuth 2.0 to fail and then finding out what fixes it, I have created a crazy number of Azure Active Directories and demo Business Central tenants, and what confuses me most is that I even managed to figure out a way to create an unmanaged AAD, get Business Central on top of it, and then still be able to use OAuth 2.0 without performing administrative takeover (I don’t have more time to play around this specific scenario, but it seems to me that if you create a new AAD from the context of an existing Azure account, and then create a user for that AAD, and then sign up for Business Central, you get an unmanaged AAD and working Business Central OAuth 2.0. Seems that the only way to get a “messy” one is to start the entire process from the Business Central trial sign-up page and use an account not bound to an AAD already.
In any case, I hope this helped you, and now I am tired, but there are miles to go before I sleep.
Pingback: How do I: Really set up Azure Active Directory based authentication for Business Central APIs - Microsoft Dynamics NAV Community
Pingback: How do I: Really set up Azure Active Directory based authentication for Business Central APIs - Vjeko.com - Dynamics 365 Business Central/NAV User Group - Dynamics User Group
Hi Vjeko, I think you must be a wizard to find out all that stuff. As just a programmer (or a consultant) I would never find how to solve it. I asked also to DT in MS but I didn’t get an easy answer. Now i know why. I hope to see u in Italy soon. Davide
Hi Davide! Yes, this was a really tricky one, cost me endless hours of investigation, and trial and error. I’ll be in Italy soon, did you sign up for it?
Simone said, of course 😀
Thanks a lot – very helpful guide.
Hi Vjeko,
It really helped me. Thanks a lot…!!!
One more help if possible. I can get the request from the postman say for the customer. But when i make Patch request then response will be the 400 Bad Request. its generate following error:
RequestDataInvalidRequest data is invalid.
Hi Vjeko,
Thanks for the great post. We have been using this to test out the API’s through Postman and were wondering how to configure Postman to not prompt for authentication? eg. say you have an external app/service that is connecting to the Business Central web service, which will not get prompted. How do you pass the credentials through?
We have been trying with setting the Grant Type to Client Credentials (and adding app_access permissions on the Azure App Registration), which seems to give you the token but when you perform a web service request (get/post) it comes up with an error, advising the credentials provided are incorrect.
Regards,
David.
Hello David, I am on the same problem, could you solve it?
I am sorry, I simply missed the question from David, but now I see this one. I am not sure exactly what or why isn’t working – getting a token that works with web service calls. Maybe it has to do with the exact OAuth flow that you are using. In Waldo’s and my TechDays 2019 session I have a lengthy discourse on OAuth and how it’s supported in BC, which flows you can use, and which can’t, and there are even examples on how to obtain a token. If that doesn’t help, let me know, maybe I could make a blog post about this stuff with step-by-step instructions.
Awesome – works like a charm – thank you for sharing
Thanks, glad it helped 🙂
How about an update. Great info, a few curly bits but Azure doesn’t look anything like this anymore.
😀 I bet it doesn’t. But I certainly won’t keep the screenshots on my blog up-to-date with what Azure looks this day. This is a blog (= “Web” + “Log”, i.e. a diary), not a documentation website.
Will you step-by-step guide work for BC api (On-prem) as well?
No, sorry, I don’t think I’ll have time to do this. I mostly blog about the stuff that’s currently on my plate, and API most certainly isn’t. Maybe some time in the future, time will tell.
Thank you Vjeko. I was stuck on the MS documentation when I found this blog. I followed your steps and it worked. Your blog saved me lot of time.
Thank you for this blog. Unfortunately I spend a ridiculous amount of time before I read it, but now I’ve used it as a checklist on the setup I’ve almost got running.
I’ve created an integration app to expose all my API Pages. I can call it from Postman, but only at “high level”. i.e
URL/companies to se a list of companies or just URL to see the available methods.
However, when I call one of my pages i get an error: “You do not have access to this object using an application as authentication.”
If I use basic authentication in Postman it works fine so the API is available and the app in the AAD is granted close to every permission.
Do you know this message?
I haven’t myself ever seen this message, but I suppose it might have to do with OAuth. I know that Microsoft was saying they would eventually only allow OAuth to connect to BC API, and that basic authentication won’t be allowed at a point. Maybe that has happened.
I’m just pasting this URL without checking anything – maybe it helps, maybe it doesn’t: https://docs.microsoft.com/en-us/dynamics365/business-central/dev-itpro/webservices/authenticate-web-services-using-oauth
Hello
We are experiencing the same issues as Jens described.
The App is registered on the Azure AD and has been given all available permissions for BC.
When using grant_type “Client_Credentials” in the request for a token, a “Bearer Token” is returned.
When we make a call to get the companies of the evironment we get a result back with the companies listed.
This seems Fine but.
When sending a request via Postman to get a list of Vendors/Customers/….etc. an error is returned saying that we do not have sufficient permissions on the object that exposes the data.
Error:
“You do not have the following permissions on Page APIV2 – Vendors: Execute.”
When using “Grant_Type” “Password” in which you include a username and password in the request to receive the bearer token this all seems to be working fine.
It seems silly that Basic Authentication would be deprecated because it’s not “Secure” but an explicit username and password is required to be able to receive a “Bearer Token” which enables you to get data out of the BC environment.
This problem inhibits the developers of creating solutions in which 3rd Parties need to be able to access data from an environment.
Without a way of allowing authentication via the “Grant_Type” “Client_Credentials” It does not seem possible to create generic addons which would work for all customers.
Yes, I understand your frustration here. Personally, I believe that there are legitimate use cases for basic authentication. And honestly, I don’t see why Microsoft doesn’t see it that way.
Did you get to the bottom of “You do not have access to this object using an application as authentication” I am experiencing he same. Web access key is fine though.
Still having this issue on custom apis. /companies an native apis do work with oauthv19.0.32956 onprem. Any solutions? Regards Aldo
{
“error”: {
“code”: “Internal_ServerError”,
“message”: “You do not have access to this object using an application as authentication. CorrelationId: 80a159cb-6b95-463f-9822-c95e33dfa25f.”
}
}
Valar dohaeris!
Thank you for the comprehensive guide on setting up Azure Active Directory-based authentication for Business Central APIs. Your detailed, step-by-step instructions and troubleshooting tips are extremely valuable, especially given the potential complexities involved. As a company specializing in Dynamics 365 Business Central implementation, this information is highly relevant for ensuring secure and efficient API integrations. Your insights into managing both managed and unmanaged AAD setups will help us navigate similar challenges and streamline our authentication processes. We appreciate your expertise and dedication to providing such a thorough resource.